1500+ reviews


You've wiped down the kitchen, put away the food, and turned off most of the lights. Then another ant crosses the windowsill and disappears behind the trim. You check beneath the sink, see nothing obvious, and start wondering whether the nest is inside the wall or somewhere out in the yard.
Finding a carpenter ant nest means connecting ant movement with the home's moisture history, not just searching the room where you see the most workers. In humid Southeast Texas, that means looking closely at old leaks, rain-exposed wood, and outdoor nesting sites before reaching for a spray can.
Why Carpenter Ant Nests Are Hard to Find
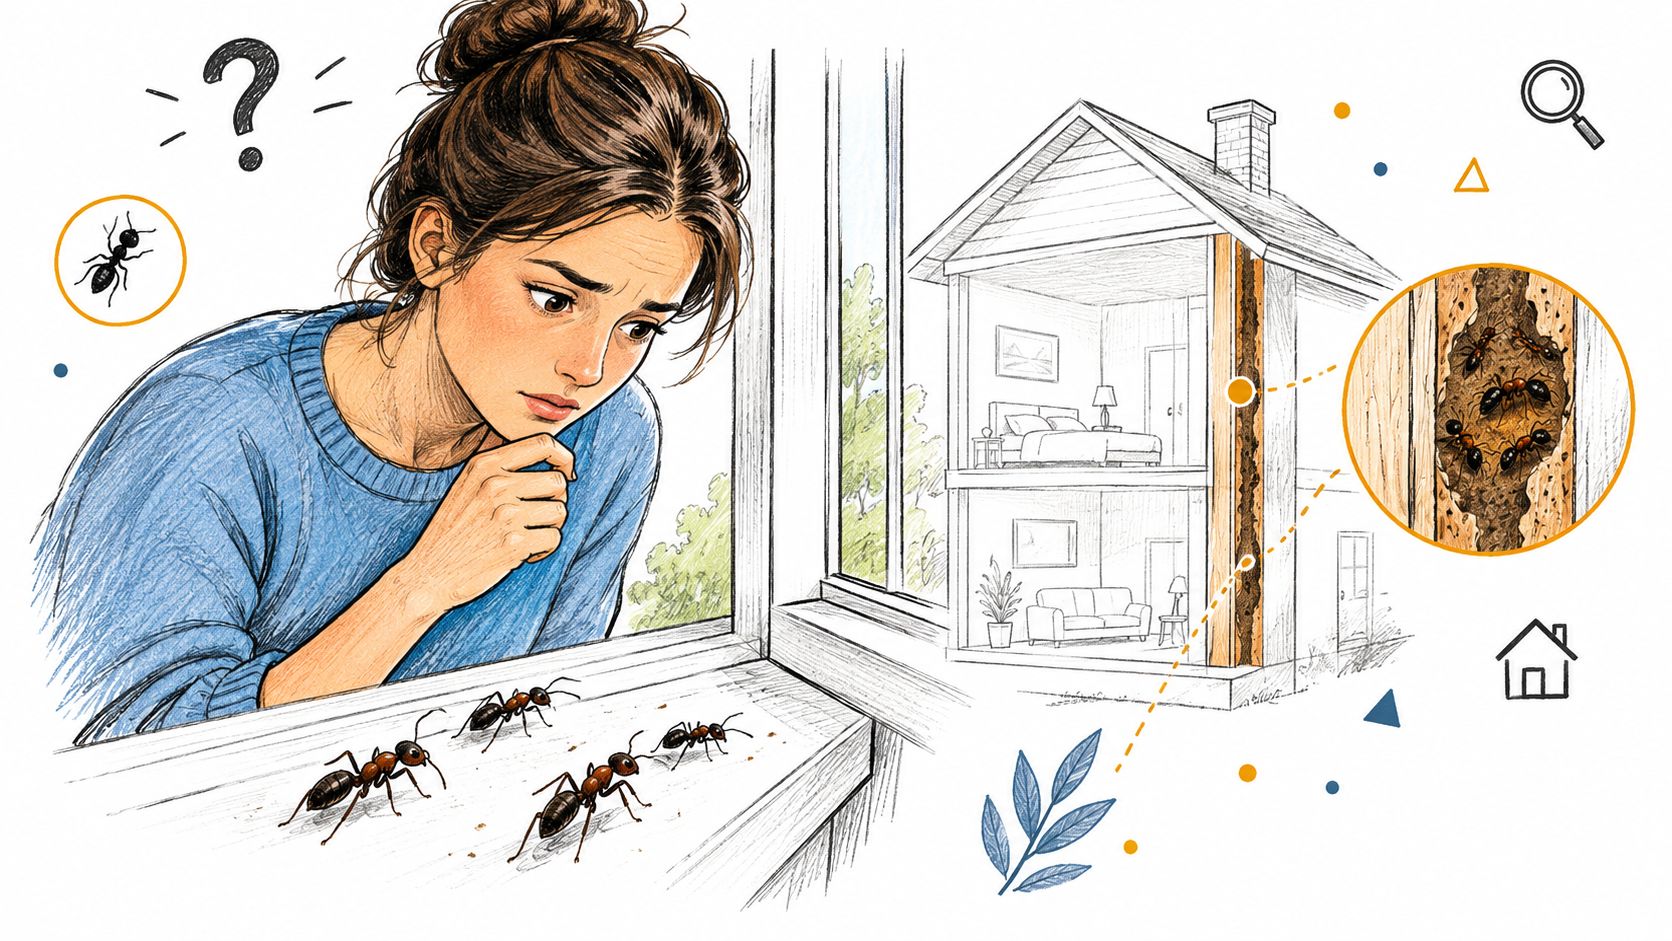
An evening trail across the kitchen counter tells you where ants are traveling. It doesn't necessarily tell you where they're nesting. Treat that distinction as the starting point of the inspection, especially when workers disappear into a clean-looking gap beside a window.
This illustration shows why visible activity can be only part of the problem.
Think Beyond the Room With Ants
Carpenter ants commonly maintain a parent nest and satellite nests. Outdoor locations include tree holes, stumps, logs, and planter boxes; indoor locations include wall voids, attics, insulation, hollow doors, casings, cabinets, and beams. Wood moisture content of at least 15% is a useful inspection threshold, but satellite nests can occupy warmer, drier spaces, according to North Carolina State University's carpenter ant guidance.
That changes how you interpret a recently repaired leak. A dry ceiling today doesn't erase the importance of the roof leak that previously soaked the framing. Likewise, checking the kitchen cabinets alone won't resolve whether workers are arriving from an outdoor nest.
Practical rule: Use the busiest room to find a trail. Use the home's moisture history to decide where that trail deserves closer investigation.
Build a Search Map Before Treating
Start by recalling where water has entered the house. Think about the window that leaks during wind-driven rain, the porch corner that stays damp, or the cabinet floor damaged by a plumbing fault.
Mark those locations separately from ant sightings. When the two overlap, you have a stronger inspection target than either observation provides alone.
Random spraying works against this investigative approach because removing visible workers doesn't identify their destination. The useful question isn't whether you can kill the ants on the sill. It's whether you can establish where they travel, what wood is vulnerable, and whether the activity connects the house to the grounds.
Start Your Inspection Where Moisture Collects
Begin in daylight, when you can see staining, drainage problems, and damaged wood clearly. Carry a flashlight even outside so you can inspect shaded joints and the undersides of accessible trim.
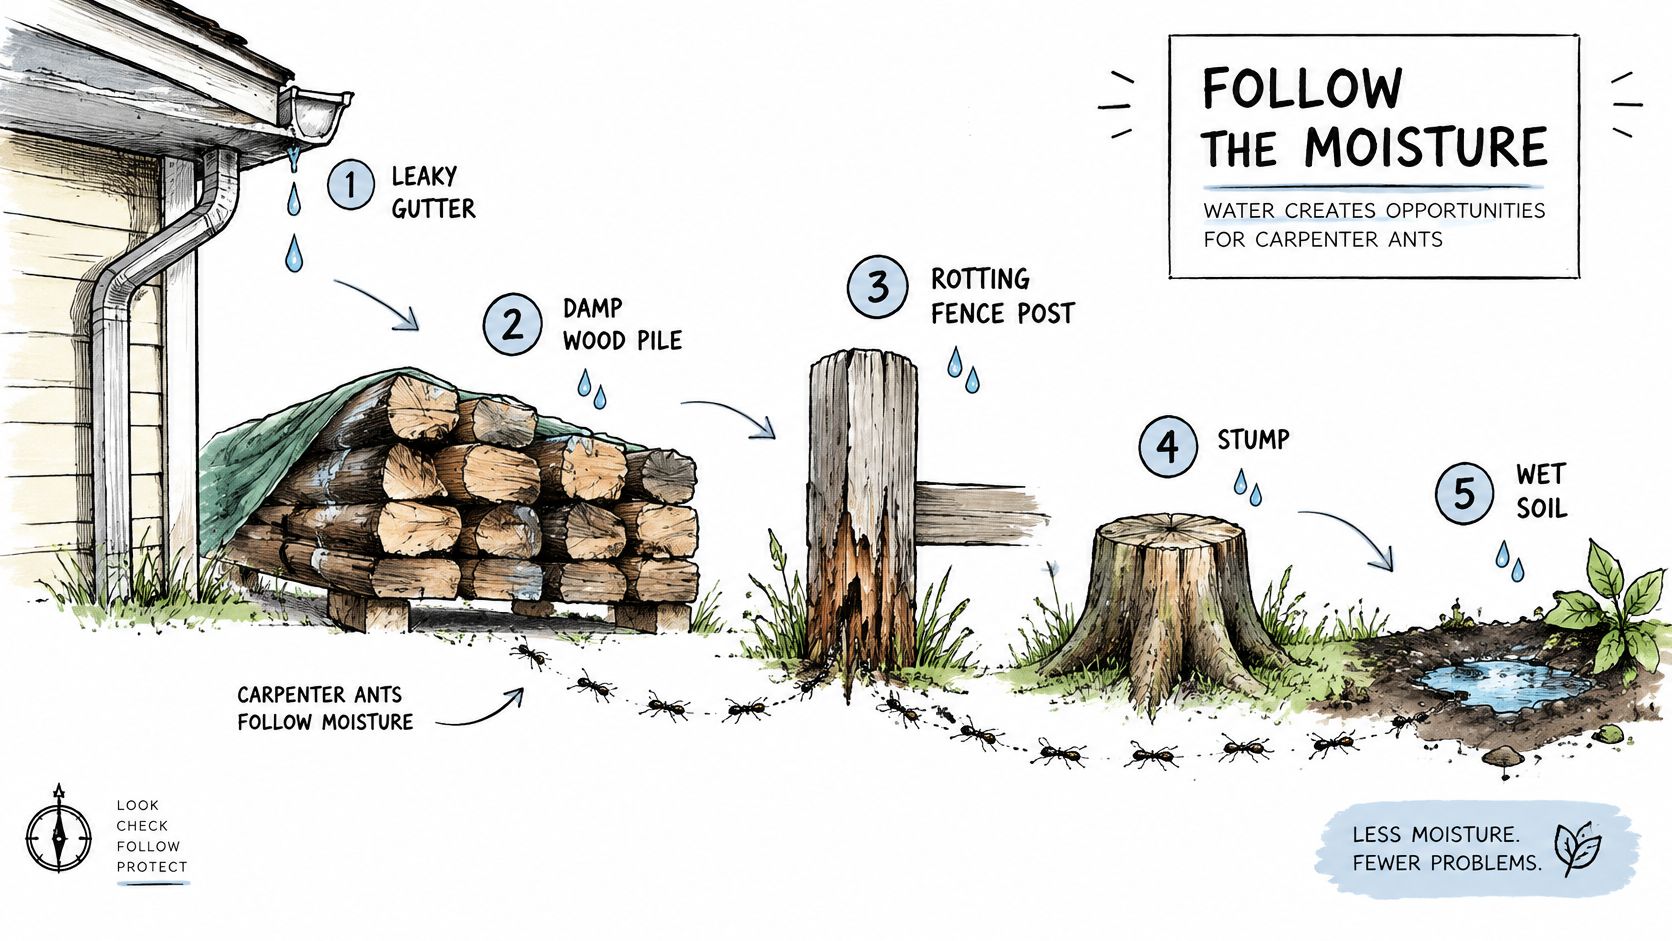
Use this moisture map as a guide rather than treating every location as equally suspicious.
Work From Water Entry to Affected Wood
Nebraska Extension's carpenter ant inspection guidance identifies dead limbs, logs, posts, landscaping timbers, and structural wood as nesting locations, including rain-exposed areas around windows, roof eaves, decks, and porches. The recurring conditions to investigate include clogged gutters, leaking frames, plumbing leaks, poor porch drainage, and soil-to-wood contact.
Use a consistent route:
- Roof edges and gutters: From the ground, look for overflow staining and damp fascia or soffit areas. Mark anything that requires a roofer's closer inspection.
- Window and door frames: Examine lower corners, the trim beneath them, and adjacent wood. Check both sides of a suspect opening where accessible.
- Plumbing areas: Look beneath sinks and around accessible dishwasher, bathtub, and supply-line areas for dampness or previous repairs.
- Attics and crawl spaces: Inspect only where access and footing are safe. Record staining and condensation rather than assuming every moisture problem is an active roof leak.
- Ground-level wood: Check porch supports, deck connections, outdoor timbers, and wood touching soil.
For a separate building-envelope review, the attic condensation advice from HIBCO ROOF, from HIBCO ROOF LLC, is a resource to discuss with your roofing contractor. Keep the moisture diagnosis and pest diagnosis connected without assuming they're interchangeable.
Extend the Walkthrough Into the Yard
At each suspect area, look beneath openings for sawdust-like material, then note any workers and their direction of travel. Continue into surrounding trees, stumps, logs, and firewood instead of stopping at the exterior wall.
Keep the sequence simple: identify moisture, locate debris or openings, observe movement, and inspect connected outdoor wood. Don't start pulling apart trim just because a location looks damp.
For a visual companion to the walkthrough, use the video below.
Finish the daylight inspection with a short list of places to revisit after dark. A focused list is more useful than wandering around the entire property with a flashlight.
Use Night Trailing to Follow Workers Home
Return to the locations where you observed ants. Keep the inspection quiet and deliberate, and resist the urge to disturb every worker you find.
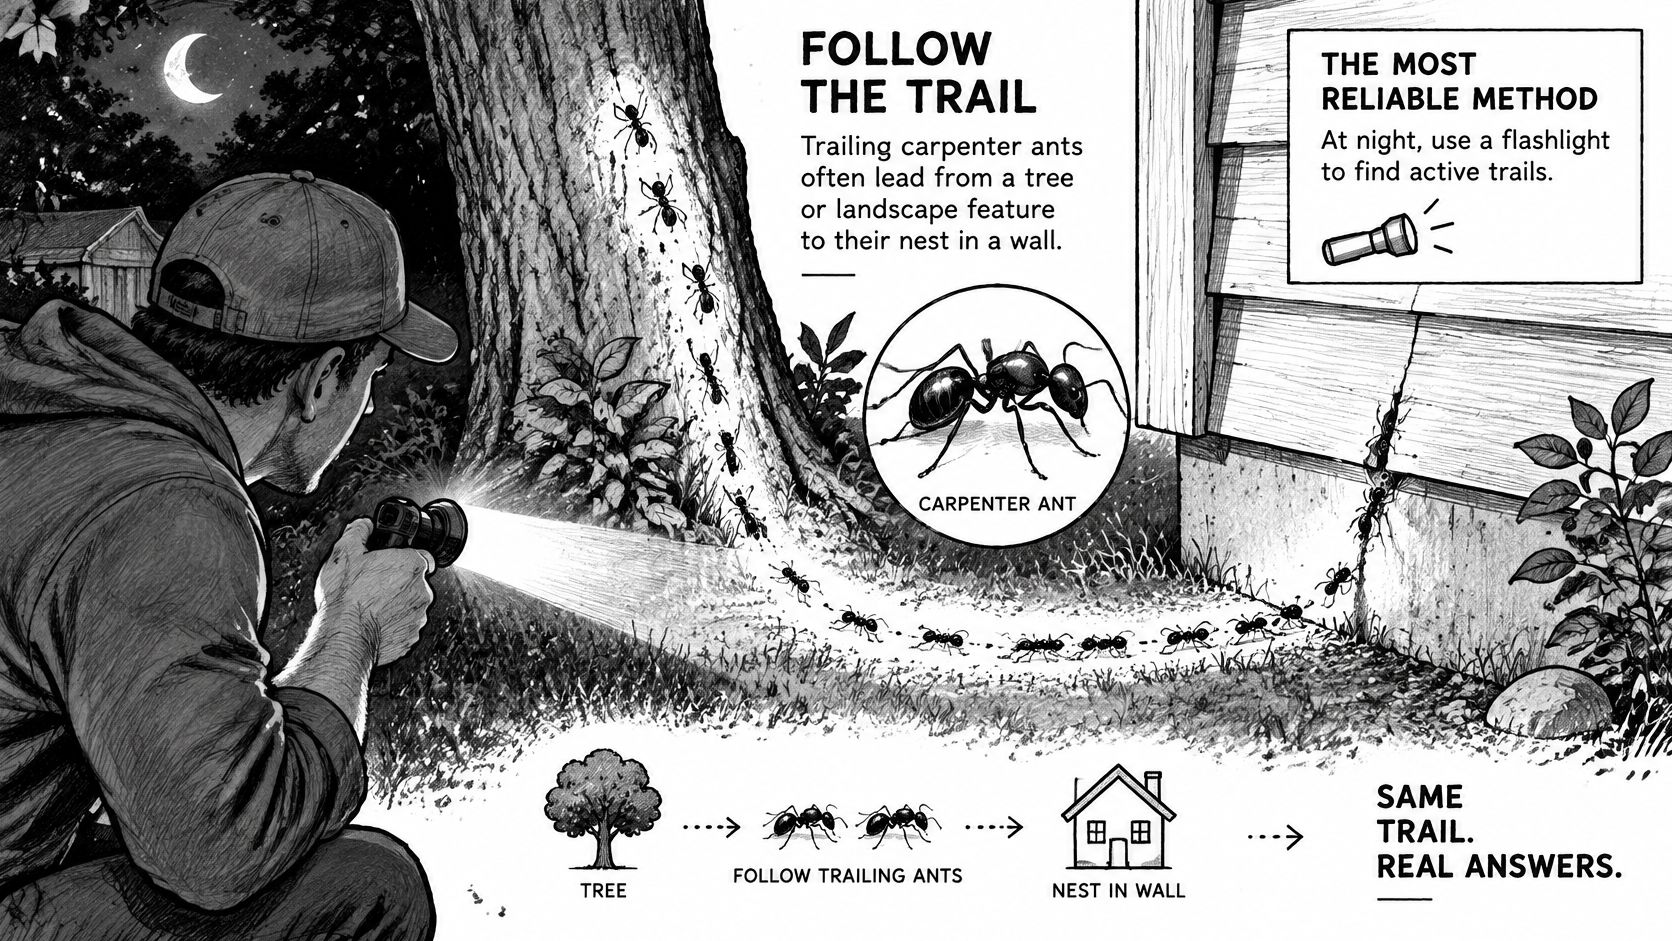
A flashlight lets you track movement without opening the structure.
Follow Returning Workers
Plan the main trailing session for roughly 30 minutes after sunset. For nearby trees, University of Georgia recommends checking trunks more than 6 inches in diameter, 15 to 20 minutes after sundown; its carpenter ant field guidance also supports using diluted honey, 25% sugar water, or a small amount of crushed insect bait along an established trail and checking returning workers after 1–2 hours.
Start where movement is easiest to see. Follow workers carrying food when possible, watching where they go rather than assuming every ant is heading home.
- At the house: Trace movement toward window and door frames, eaves, porch columns, and accessible openings near plumbing or flashing problems.
- At trees: Walk around the trunk while sweeping the flashlight upward and downward. Note cavities and sawdust-like shavings at the base.
- At interrupted trails: Pause and watch the last confirmed location. Don't immediately conclude that the nearest crack contains the nest.
For a temporary food lure, use a small, controlled placement where children and pets can't reach it, and remove it afterward. Sugar water used for observation isn't a colony treatment, and it shouldn't be confused with a labeled insecticidal bait.
Record the Destination Without Overreading It
If ants disappear behind siding, mark the opening and photograph its relationship to nearby windows, plumbing, and roof details. Indoors, note whether the same route leads beneath a sink, beside a bathtub, or toward the dishwasher area.
An entry opening is a waypoint, not automatic proof of the nest's exact location.
Ants can continue through concealed wall or ceiling spaces beyond the point where you lose sight of them. That's why drilling directly behind an entry hole is a poor next move without supporting evidence.
Listen at suspect wood as well. A dry rustling sound after gentle disturbance can support the inspection, but silence isn't a reason to abandon a location with repeated traffic and a credible moisture history.
Confirm the Nest With Converging Evidence
Sawdust alone isn't a diagnosis. Carpenter ant excavation can produce coarse wood fragments mixed with dead ants or insect parts, but a pile below trim doesn't establish that the gallery sits immediately behind it.
At accessible suspect wood, inspect for water damage, probe carefully with a screwdriver, and tap with the blunt handle while listening for a hollow response. These techniques, along with listening for scraping or rustling, are described in the University of New Hampshire carpenter ant fact sheet. None should become an excuse to punch through a finished surface.
Carpenter Ant Nest Evidence and What It Proves
| Sign observed | What it suggests | Next action |
|---|---|---|
| Coarse debris containing insect fragments | Nearby excavation consistent with carpenter ant activity | Photograph the material and inspect above and around it |
| Repeated nighttime traffic at an opening | An established route worth tracing | Record direction and compare with nearby moisture damage |
| Hollow-sounding accessible wood | A possible cavity or damaged area, not a confirmed pest identification | Compare adjacent areas and avoid destructive probing |
| Rustling or scraping at suspect wood | Possible activity within the material or adjoining void | Seek supporting trail and debris evidence |
| Water-damaged wood beside an active route | A higher-priority inspection location | Document the leak history and investigate safely |
| No visible debris | No useful conclusion by itself | Continue evaluating concealed routes and other signs |
Missing Frass Doesn't Clear the Wall
Frass is easiest to detect when ants eject it through an opening you can see. Trails may instead run beneath baseboards, carpets, insulation, or siding, so a clean floor doesn't rule out concealed activity. Utah State University's carpenter ant fact sheet supports combining trail observations, repeated activity, sounds, debris, and moisture damage rather than relying on a single sign.
Think of this as evidence weighting, not a numerical scoring system. A random pile of wood dust deserves investigation, but repeated nighttime traffic beside water-damaged framing gives you a more focused reason to inspect that location.
Before choosing treatment, confirm the insect as well. Use this carpenter ant versus termite comparison as an identification aid, and save a clear photograph or specimen for a technician if you're uncertain.
The practical stopping point is reached when you can identify a suspect zone but can't safely establish what lies inside it. More force with a screwdriver won't solve that uncertainty.
DIY Inspection or Professional Treatment
A homeowner-led inspection is useful when the work stays observational: documenting activity, identifying accessible moisture problems, and tracing outdoor routes. It becomes less worthwhile when the next step involves opening walls, reaching concealed framing, or applying treatment into an uncertain cavity.
The trade-off isn't just cost versus convenience. It's whether further DIY work will produce reliable evidence without creating unnecessary damage or exposure.
Match the Work to the Access
| Homeowner-led inspection | Licensed professional inspection and treatment |
|---|---|
| Useful for accessible trails and moisture mapping | Appropriate when activity leads into inaccessible voids |
| Produces photos and a location history | Connects inspection findings to a treatment plan |
| Lets you arrange straightforward leak repairs | Helps evaluate persistent activity after repairs |
| Should stop before destructive exploration | Can determine whether targeted access is justified |
FullScope Pest Control is one local option, with licensed technicians using integrated pest management and targeted chemistry through an inspection, treatment-plan, and ongoing-protection process. Its company website describes QualityPro certification, eco-friendly low-toxicity options for households with children and pets, and a follow-up service policy within stated windows.
Discuss household needs before any application. Low-toxicity options aren't a substitute for following label directions, protecting sensitive areas, or understanding reentry instructions.
Magnolia and the North Houston Service Area
Magnolia, Texas, is in southwestern Montgomery County, within the Houston metropolitan area and the northwest Houston corridor between The Woodlands and Lake Conroe. The Magnolia geographic overview helps distinguish the incorporated city from the broader community using Magnolia mailing addresses.
For scheduling, provide the property's city and ZIP code rather than relying on a Magnolia mailing address alone. Ask the office to confirm the specific address, including nearby unincorporated Montgomery County properties.
The surrounding service region includes Conroe, Montgomery, Spring, New Caney, Kingwood, Porter, and Cleveland, along with other north Houston communities. Confirm coverage and the appropriate service arrangement before booking, particularly for properties outside city limits.
Use these considerations when choosing a pest control company to compare inspection scope, treatment explanations, and follow-up terms. A useful proposal should distinguish what the technician confirmed from what still needs investigation.
Safety Tips and Tools for a Safe Search
Bring tools that help you observe without turning the inspection into demolition. You don't need to expose every cavity to collect useful information.
Pack for Observation
- Bright flashlight: Illuminate shaded joints and watch travel routes without reaching blindly into openings.
- Screwdriver: Probe only accessible, already suspect wood, using light pressure.
- Blunt-handled tool: Tap gently for differences in sound, not hard enough to break trim.
- Gloves: Protect your hands when handling accessible rough wood or debris.
- Phone or notepad: Log locations, directions of travel, photographs, and the weather or leak conditions you observed.
Keep tools away from live outlets, concealed wiring, and gas lines. Don't probe through a wall or cabinet surface when you can't establish what's behind it.
Recognize the Stop Signals
Stay off wet roofs and unstable porch structures. Don't enter an attic or crawl space if you lack secure footing, suitable access, or confidence about the air conditions.
Stop and call: Unsafe access, suspect structural wood, exposed wiring, or an inspection that requires cutting into concealed spaces.
Avoid spraying visible workers while you're still trying to follow them. Even without knowing how a particular product will affect their movement, killing the workers you're observing removes useful trail evidence.
For Kingwood and Conroe homeowners, moisture repair belongs in the same work plan as pest inspection. Arrange qualified help for roof, plumbing, drainage, or damaged-wood repairs rather than treating those jobs as optional cleanup after the ants disappear.
Your Next Steps After Locating the Nest
Turn your observations into a record someone else can use. Photograph the suspected location, the surrounding wood, and the route leading to it, then note which findings you directly observed and which remain uncertain.
Put the Findings Into Action
- Document the evidence: Keep the location notes and photographs together.
- Address the water source: Arrange the appropriate roof, plumbing, or drainage repair.
- Evaluate damaged wood: Have compromised material assessed and replaced where practical.
- Choose treatment and monitoring: Base the decision on access, confirmed activity, and the scope of the problem.
Don't treat the first located site as proof that the inspection is complete. Revisit the original observation points after repairs and treatment, and report continued activity rather than assuming it's unrelated.
Review the carpenter ant treatment FAQs before booking so you can discuss access, preparation, and follow-up. Ask whether one-time remediation or a scheduled quarterly or biannual plan fits the activity found at your property.
For a home in Magnolia, Conroe, or the surrounding north Houston area, schedule an inspection through the company website and provide your address, leak history, and trail photographs. Ask the technician to confirm the nesting evidence, explain the treatment approach, and identify the repairs and follow-up checks needed for ongoing protection.