 1500+ reviews


How to Tell if You Have Termites in Your Home

You notice a dark patch along the base of a wall after rain, or find a few pale wings on a windowsill while cleaning. Maybe the slab edge looks damp long after the patio dries, or a door suddenly sticks without an obvious reason. In a Magnolia, Texas home, those clues deserve attention even when you can't find a single termite. The practical answer to how to tell if you have termites starts with more than visible insects. Look for a pattern involving unexplained moisture, shelter tubes, damaged wood, pellets, wings, and changes in the structure. A clean-looking room only tells you that the room looks clean. It doesn't prove that the wall cavity, sill area, crawl space, or slab edge is clear. Why Termite Problems Stay Hidden Until They Get Expensive A Magnolia homeowner may first notice termites while sweeping beneath a window, moving storage boxes in a garage, or checking a wall that has developed a strange blister. The obvious sign often appears well after termites have found a concealed route into the structure. Subterranean termites can remain hidden in soil, wall voids, insulation, or mud shelter tubes, while drywood termites stay inside the wood they consume. Termites are effective at hiding for three related reasons. They avoid open, dry exposure, they travel through protected routes, and they can feed inside wood while leaving much of the outer surface intact. The USDA Forest Products Laboratory guidance on subterranean termites explains that these insects may consume the interior of wood while the exterior shell remains in place. Why a clean room proves very little A visual inspection that covers only finished rooms misses the locations where evidence commonly develops. Termites may enter near a plumbing penetration, remain behind a baseboard, or travel beneath a slab edge before reaching a wooden component. In a crawl space, insulation and ductwork can hide the route entirely. Swarmers and discarded wings are valuable evidence, but they offer only a short observation window. Mississippi State University Extension notes that colonies may swarm for only about one day per year, so the absence of swarmers doesn't rule out activity. Wings indoors, especially near windows, lights, or wall openings, should prompt an inspection rather than reassurance. Practical rule: Treat a clean-looking surface as unexamined until you have checked the moisture sources, entry points, accessible wood, and protected edges around it. The first inspection question should be, “Where could termites stay protected here?” On a slab home, that means foundation edges, plumbing penetrations, porches, expansion joints, utility entries, and areas where soil, mulch, siding, or stored wood come close to the structure. In a crawl space, add sill plates, joists, support piers, and any place where ventilation or drainage leaves wood damp. The purpose of screening isn't to prove a suspicion from one dramatic clue. It is to collect enough evidence to distinguish current activity, old damage, water damage, decay, and another wood-destroying insect. Walking the Perimeter, Crawl Space, and Slab Edge Start outside and work inward. Subterranean termites usually need a protected connection between soil and wood, so the foundation perimeter often gives you the most useful first evidence. Walk slowly with a flashlight, screwdriver, phone camera, and a way to record locations. Begin where soil meets the structure Inspect foundation walls, slab edges, porch supports, garage edges, and places where plumbing or utilities enter. Look for earthen shelter tubes, which are commonly about 1/4 to 1/2 inch wide according to the county inspection guidance compiled by San Diego County. They may look like narrow dirt trails climbing concrete, crossing a pier, or disappearing beneath siding. Don't scrape every tube away before documenting it. Photograph the entire route, then take a close image that shows texture and location. If it's safe and accessible, break a small section rather than destroying the whole tube. Check it over the following several days. Repair activity or live workers indicates that termites are using the route, while an untouched break only tells you that the route wasn't repaired during that observation period. Check the following locations carefully: Foundation transitions: Look where brick, siding, trim, and slab edges meet. Moisture entries: Inspect around hose bibs, plumbing penetrations, condensate discharge, and leaking outdoor fixtures. Porches and supports: Examine posts, steps, lattice, and wood close to soil. Crawl spaces: Check sill plates, joists, support piers, insulation edges, and plumbing openings. Stored materials: Move firewood, cardboard, lumber, and dense mulch away from the wall before inspecting the surface behind them. A property with older construction features or concealed framing can benefit from broader building-context guidance, including this surveyor's guide to 1930s houses from Corinthian Surveyors London LTD. It helps explain why age, alterations, ventilation, and hidden voids affect what a surface inspection can reveal. Use a short field checklist Screenshot this before walking the house: Photograph every tube before disturbing it. Check slab edges, piers, sill plates, joists, and penetrations. Look for wood-to-soil contact and persistent dampness. Probe only exposed, safe wood. Note wings, pellets, soft spots, stains, and blistered finishes. Mark each finding by room or exterior wall. Leave concealed or unsafe areas for a professional. A clean foundation is useful information, but it isn't a clearance certificate. Termites can travel behind finished surfaces or enter where the route isn't visible from the exterior. Reading Wood Damage Patterns by Sight and Sound Wood damage tells you where termites may have been feeding, but it doesn't identify the cause by itself. Water intrusion, fungal decay, carpenter ants, construction damage, and termites can all produce soft or discolored material. Compare suspicious wood with a nearby sound piece made from the same material whenever possible. Run your eyes across trim, sill plates, exposed joists, door frames, and flooring transitions. Blistered, swollen, or sunken wood can indicate concealed galleries or moisture damage. Maze-like lines beneath a thin surface, pinholes, and wood that resembles water damage deserve closer attention, particularly when the nearby moisture source hasn't been explained. Tap the suspect area with the handle of a
How to Fix Termite Damage in Kingwood and Conroe Homes

The first step in how to fix termite damage is to eliminate or contain the active colony and verify structural safety before repairing any wood. Subterranean termites account for approximately 95% of termite damage to U.S. buildings, and termite-related residential and commercial losses exceed $1 billion annually. You notice a soft spot near a baseboard, a floorboard that sounds hollow, or a thin mud tube climbing a foundation wall. The natural reaction is to pull out the damaged board and replace it. That approach can waste money if termites are still moving through the soil, wall cavity, crawl space, or concealed framing. Termite damage repair has two separate jobs. First, stop the infestation and identify how the termites reached the house. Second, determine which wood can remain, which wood has lost strength, and which repairs require a contractor or structural engineer. Southeast Texas adds another complication because moisture and fungal decay can soften wood in ways that resemble termite damage. The Critical First Step in Termite Repair Replacing visible wood before controlling termites is the most common repair mistake. A new baseboard, sill section, or floorboard can look perfect while termites continue using an untreated foundation crack, plumbing penetration, damp crawl space, or soil-to-wood contact point. A sound repair sequence begins with a qualified pest inspection and a structural assessment. The pest professional looks for active termites, mud tubes, swarmers, galleries, moisture conditions, and entry routes. A qualified building professional evaluates whether the affected wood supports floors, walls, roofs, porches, or other parts of the load path. The University of Nebraska–Lincoln termite guidance recommends checking basements, crawl spaces, sills, joists, support posts, porch structures, window frames, foundation cracks, mud tubes, and areas where swarmers appear. Control first, rebuild second The colony must be eliminated or contained before reconstruction. Subterranean termites often live in soil rather than inside the damaged board, so removing that board doesn't remove the source. Effective treatment aims to create a continuous barrier between the colony and the building's wood. Depending on the property, treatment may include soil-applied termiticide, baiting, localized wood treatment, mechanical corrections, or a combination. A complete liquid barrier can require hundreds of gallons of termiticide injected 3 to 5 feet into the ground beside foundations and beneath slabs, according to Iowa State University Extension information included in the UNL bulletin. That doesn't mean every home needs the same treatment. It means the applicator must account for the home's construction, slab edges, crawl spaces, plumbing penetrations, drainage, wells, and access conditions rather than spraying only the termites that are easy to see. Practical rule: A replacement board is not proof of a completed termite repair. The treatment record and structural assessment matter just as much as the new lumber. Verify the wood before closing walls After treatment, don't immediately cover suspect framing with drywall, insulation, flooring, or trim. The inspection should identify whether activity is current, estimate the extent and age of damage, and separate cosmetic deterioration from compromised structural members. Keep photographs of the original damage. Ask for a written treatment diagram, the affected areas, the recommended repair scope, and the follow-up plan. This documentation gives the contractor a reliable starting point and makes it harder for concealed damage to disappear behind a finished surface. Identifying Active Infestation Versus Old Damage A damaged board doesn't tell you whether termites are still present. It only tells you that something weakened the wood. In Southeast Texas homes, the competing explanation may be fungal decay caused by persistent moisture, poor drainage, plumbing leaks, or damp crawl-space conditions. Active subterranean termite evidence commonly includes mud tubes, live termites, fresh galleries containing soil-like material, discarded wings near windows or light sources, and new swarmers. A tube that has been repaired after breaking can suggest current movement, but a professional needs to inspect the surrounding structure before calling the infestation active or inactive. Old damage may appear dry, weathered, and disconnected from current entry routes. That still doesn't make it harmless. A sill plate or joist damaged in the past may remain too weak to carry its intended load, even if no live termites are visible. What homeowners can check safely Use observation first, then limited probing. A screwdriver, ice pick, or knife can help identify wood that is soft, hollow, or easily penetrated, but probing isn't a substitute for a qualified inspection. Don't pry apart structural framing, remove load-bearing components, or disturb treated soil to search for insects. Look at the pattern, not just the softness: Mud tubes: Check foundation walls, piers, slab edges, crawl spaces, and concealed corners. Hollow sound: Tap solid-looking wood and compare it with nearby sound lumber. A hollow sound is a warning sign, not a diagnosis. Swarm evidence: Discarded wings and dead swarmers near windows or doors can indicate a nearby colony, but they don't identify the full extent of damage. Gallery damage: Channels running through the grain, especially with soil or debris, deserve professional evaluation. Moisture exposure: Check leaks, wet insulation, blocked drainage, damp soil, and areas where framing touches masonry or soil. Why moisture changes the diagnosis Southeast Texas conditions can make termite and decay damage overlap. The USDA guidance referenced in the provided repair information identifies wood above 20% moisture content as susceptible to decay, so a damp sill or crawl-space joist may have both fungal deterioration and termite damage. A pest professional may identify insect evidence, while a contractor or engineer determines whether the remaining wood can safely carry its load. Don't use the absence of live termites as permission to repair blindly. The EPA's termite identification and control guidance calls for a thorough structural inspection before treatment and distinguishes treatment of the colony from repairs to damaged building components. The right question isn't just, “Does this board look bad?” Ask instead: Is the damage active, what caused the access, and does the wood still perform its structural job? Treatment Options and Structural Safety Once the inspection identifies the source, treatment should match the construction and the infestation.
What Do Termite Tunnels Look Like? Texas Guide
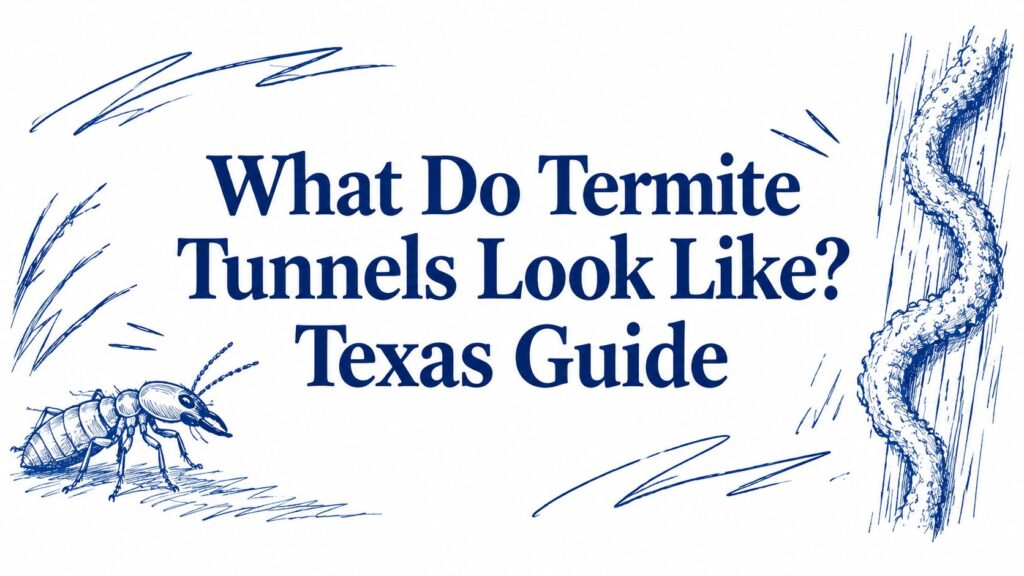
You're walking around your Magnolia home when a thin, dirt-colored line catches your eye on the concrete foundation. It looks too deliberate to be ordinary soil, but too small to seem like a serious problem. That narrow mark may be a subterranean termite shelter tube, and the visible section may represent only one access route from a hidden colony. The practical answer to what do termite tunnels look like is more nuanced than “a pencil-sized line of mud.” Tubes can be narrow, dry, branching, patchy, or blended so closely with masonry that homeowners miss them during a quick inspection. Knowing where to look, how the material behaves, and whether the structure is active gives you a much better starting point than scraping it away and hoping the termites disappear. Identifying Termite Shelter Tubes on Your Property A subterranean termite shelter tube is an earthen passage built across an exposed surface. It usually appears as a narrow, crusted line of dried dirt on a foundation, wall, crawl-space pier, or masonry surface. The purpose is protection. Termites use the covered route to travel between soil and a food source while reducing exposure to dry air and predators. During a preliminary check, start at the places where the ground, structure, and moisture meet. Walk the entire exterior perimeter with a flashlight, even if the suspicious mark is only on one side of the house. Where to direct your flashlight Check these areas closely: Foundation walls: Look for vertical lines rising from soil, landscaping, expansion joints, or slab edges. Masonry and concrete: Inspect cracks, corners, utility penetrations, steps, and areas where tubes can follow an irregular surface. Crawl-space piers: Examine both sides of wooden or masonry supports, especially where the pier meets the ground. Wooden supports: Check sill plates, joists, porch framing, and other wood located close to soil. Fence lines and outdoor wood: Stumps, timbers, and fence posts can provide nearby access points even when the house itself shows little visible evidence. The tubes are commonly about pencil-width, roughly one-quarter inch, according to Texas A&M AgriLife's reference on subterranean termites. That description helps, but don't treat it as a strict measurement. A tube may look like a raised dirt seam, a flattened strip, or a thin crust that disappears around a corner. Practical rule: Photograph the tube before disturbing it. Include a close view and a wider image showing its location on the property. You can also compare your observation with this guide to what to do after spotting a termite mud tube. The key point is simple: a visible tube deserves inspection, but its presence alone doesn't tell you how far the colony has traveled or whether the route remains active. The Variable Size and Texture of Mud Tubes The building material is a mixture of soil or wood particles bound with termite saliva and fecal matter. That blend produces an earth-toned surface that can resemble dried dirt, tan soil, brown sediment, or a gray crust. On concrete, the tube may be only slightly darker than the wall. In a crawl space, it can blend into dusty masonry or exposed soil, so a quick visual check may miss it. The material composition is described by Texas A&M AgriLife. Why width isn't a reliable diagnosis Field observations show that tubes may range from one-quarter inch to one inch or larger, particularly where a colony is active and established. A narrow route may serve as a protected passage, while a wider section can reflect repeated travel, repairs, or a need to move more workers and material. Width should guide inspection, not decide the diagnosis. Scientific work also describes narrower egress structures measuring 3 to 5 millimeters. Other termite species build fewer, wider, less-branched tunnels. The research in this study of termite tunnel architecture helps explain why a suspicious line should not be dismissed because it is thin or lacks a rounded profile. Texture offers additional clues: Dry and crusted: Exposure to air or changing moisture may harden the outer surface. Patchy or incomplete: Termites may cover only the section needed to cross an exposed area. Rough and granular: Sand, soil, wood particles, and organic debris can leave an uneven finish. Flattened against masonry: Limited space and pressure from the wall can make the tube look like a dirt smear. Slightly damp or compact: Moisture can keep the material cohesive and make it appear darker. Texas soil conditions affect what an inspector sees. Sandy material may leave a loose, grainy surface, while clay-rich soil can form a smoother, denser crust. Moisture near slab edges, shaded crawl spaces, or poorly drained areas can also keep tubes darker and less brittle. Species, humidity, available particles, and the tube's function all influence its final shape. A narrow, dry, or broken-looking tube doesn't rule out activity, while a thick tube does not prove termites still use it. Appearance identifies where to investigate. Activity requires a closer check of the route, surrounding soil, and nearby wood. Understanding the Hidden Branching Network A straight line on a foundation can give the wrong impression. It suggests a single route with a clear beginning and end, but subterranean termites often work through a branching system that changes as workers locate food and encounter crowded areas. Research described by the International Research Group on Wood Protection found that tunnel systems can radiate from discovered food sites, intercept nearby sites, and branch again. Related species also differed in how much they branched. At congested tunnel faces, workers may extend the existing route or create a side branch, depending on the conditions they encounter. One visible tube can have many hidden connections The section you see on the foundation may be only the exposed part of a larger foraging system. Other routes may remain underground, pass through cracks, follow the slab edge, or enter structural wood without creating a conspicuous surface line. That distinction matters during an inspection. If a homeowner scrapes off one tube, the colony hasn't necessarily lost access. Workers may repair the