1500+ reviews


You're staring at a crawl-space door blocked by paint cans, a garage wall buried behind boxes, and a mud tube on the foundation you're tempted to scrape off before anyone sees it. That's exactly where most homeowners lose ground. Knowing how to prepare for termite inspection isn't about making the house look tidy. It's about giving the inspector clear access while leaving the evidence that separates active termites from old damage exactly where you found it.
Clear These Areas Before the Inspector Arrives
The spots that fail most often are predictable: a garage side wall buried behind shelving, a crawl-space door under a water heater, a shed nobody has a key for. Clearing those areas earns the inspector access. Clearing them the wrong way can also erase the tubes and wings that prove activity, so move things aside and leave anything suspicious exactly where it sits.
Work through the table room by room. Along the foundation, Upchurch Inspection recommends moving stored items, firewood, and clutter at least 2 feet from foundation walls, a common contractor rule of thumb that gives the inspector a clean sightline to the slab edge where mud tubes show up first.
Access areas and clearance benchmarks
| Area | What to move or open | Clearance benchmark |
|---|---|---|
| Attic | Open the hatch; move boxes off the ladder path | Walkable path to the hatch |
| Crawl space entrance | Set the access panel aside or have the key ready; clear debris, stored items and standing water | About 18 inches from the bottom of floor joists |
| Exterior foundation perimeter | Move firewood, mulch, stored items and clutter away from walls | At least 2 feet from foundation walls |
| Garage and utility room | Clear the wall line; keep the water heater and shutoffs reachable | Full wall line visible |
| Under sinks and plumbing | Empty cabinets; remove cleaners, buckets and bags | Cabinet floor and pipe penetrations reachable |
| Porches, decks, patios and sheds | Have gate and shed keys ready; clear space underneath | Full perimeter reachable |
| Vegetation | Trim shrubs and vines off siding and the foundation | No contact with the structure |
| Pets | Secure in a closed room or crate | Inspector can move freely |
Test Each Entrance Yourself
The roughly 18 inches listed for the crawl space is a typical minimum access clearance, enough room for an inspector to see the floor joists and the ground below with the area free of debris and standing water. If yours is tighter, flooded, or packed with stored lumber, say so when you book instead of hoping someone can squeeze through.
Do a one-minute walk-through before the visit. Stand at each door, gate, hatch, and panel and ask whether someone carrying a flashlight and probe could reach every wall and the foundation edge from there. In Southeast Texas garages, it's usually the side wall behind shelving and the water heater corner that fail this test.
Access rule: If you can't touch the wall, the inspector can't inspect it.
Anything the inspector couldn't reach gets recorded as an inaccessible area in the report. Buyers, lenders, and agents read those gaps as unanswered questions, and they often trigger a return visit. Opening a shed or moving a stack of bins now is cheaper than rescheduling later.
How to Prepare the Property Over the Final Week
Preparation fails when it's crammed into the hour before the truck arrives. Spread the work across the final week and use the access table above as your checklist instead of starting from scratch each day.
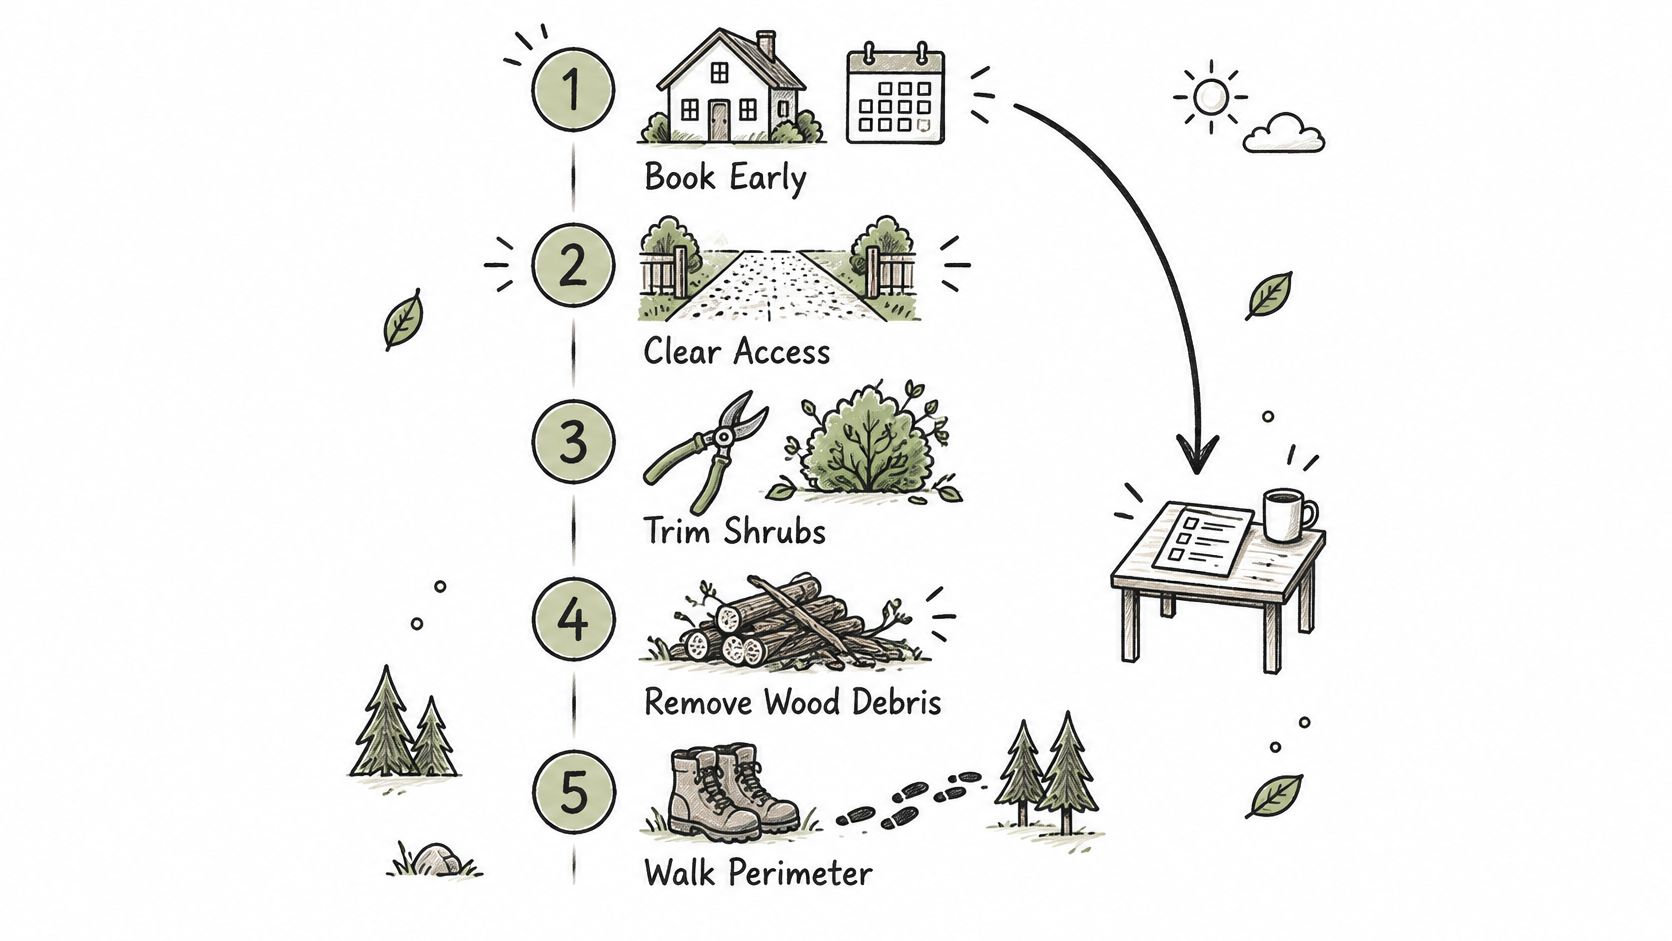
Book early. Neuse Termite and Pest Control notes that WDIR inspections are typically arranged 1 to 2 weeks before closing, so schedule as soon as the contract is signed. That window protects you if a blocked crawl space or an inaccessible attic forces a second visit.
Seven days out, gather records and keys. Pull the documents covered later in this guide and confirm who holds gate codes, shed keys, and the crawl-space panel key. A panel nobody can open leaves that whole area listed as inaccessible.
Three days out, walk every row of the access table. Fix blocked paths now, not on inspection morning. Stacked items along garage walls are the step homeowners most often miss, and they're the slowest to move under time pressure.
The day before, finish the small tasks. Confirm the attic path is walkable, empty the cabinets under sinks, and set up the closed room or crate where pets will stay. Charge your phone so you can photograph anything the inspector points out.
The morning of, do the final pass. NoToPests recommends planning 30 to 60 minutes of morning preparation focused on the perimeter, attic hatch, water heater, crawl-space entry, and major plumbing penetrations. Move obstructions, but don't move anything that's holding mud tubes, wings, or damaged wood.
During the visit, stay reachable. Walk the exterior with the inspector if you're able, answer questions about leaks and prior treatments, and ask which areas couldn't be reached before the inspector leaves. Knowing how long a termite inspection takes helps you block enough time to do that walk without rushing the findings.
Fix Moisture Problems Without Hiding the Evidence
Repair active moisture sources early, but don't dry out, bleach, or conceal a wet area right before the visit. The inspector needs to see the actual condition, because moisture patterns point straight to the wood termites are most likely working.
Where Southeast Texas Homes Stay Wet
Check the usual suspects around Magnolia-area homes. Leaking hose bibs and supply lines, blocked gutters, downspouts dumping water at the foundation, irrigation spray hitting siding, ponding near the slab, and poor crawl-space drainage all keep wood damp between storms. Humid air slows drying, so a small plumbing seep can stay active for weeks without a visible puddle.
Moisture matters beyond the soil line. Termites can establish where roof or plumbing leaks supply water even without direct soil contact, which is why a second-story bathroom leak or a slow water heater drip deserves the same attention as a wet crawl space.
A Four Step Moisture Pass
- Walk the perimeter after rain. Note wet spots, stains, soft soil, and mulch piled against siding while the evidence is fresh.
- Repair leaks and redirect downspouts. Get discharge away from the foundation instead of letting it pool at the slab edge.
- Adjust irrigation timers and heads. No spray should reach the foundation or keep the soil line constantly wet.
- Keep a dated leak log. Record where water appeared, when you noticed it, and what you repaired, then hand that log to the inspector.
Inspectors may use a moisture meter where conditions warrant it, and your dated log helps them interpret a high reading. A wall that dried last month tells a different story than one that was wet yesterday.
Flag site features before any treatment talk starts. Wells, cisterns, septic components, French drains, ponds, streams, and buried utilities all affect where products can go and how water moves under the house. Marking them with flags or noting them on a simple sketch saves the inspector from guessing.
What Not to Touch Before the Inspection
The instinct to clean up before a professional visit backfires here. Visible evidence is the raw material of the inspection, and your goal is to make it findable, not gone.
Photograph what you see instead of removing it. Purdue University extension guidance describes mud or shelter tubes at about 1/4 inch wide, though they vary, so put a tape measure in the frame when you photograph tubes, swarmers, discarded wings, and blistered or soft wood. Note the exact location, such as the north foundation wall beside the hose bib, so the inspector can find the same spot fast.
Pre-visit actions that damage evidence
| Action | Why it hurts | Do instead |
|---|---|---|
| Sealing cracks or gaps | Hides entry points and makes timing harder to read | Photograph and label, then leave for the inspector |
| Removing mud tubes | Erases proof of active versus old activity | Photograph with a tape measure in frame, then leave in place |
| Applying insecticide | Masks live activity and complicates the treatment plan | Tell the inspector what was applied and when |
| Repairing soft or blistered wood | Removes damage the report must record | Document first and repair after the report |
| Probing or digging into load-bearing wood | Can cause structural harm and skew findings | Let the inspector probe with a screwdriver or awl |
| Clearing beyond walkable paths | Removes discarded wings and tube fragments | Clear pathways only and leave debris in place |
A common misread is assuming a visible tube proves a current infestation. Tubes can be inactive while hidden activity continues elsewhere, and breaking one open yourself destroys the context the inspector uses to judge it. Preserve a representative stretch and let the professional make that call.
Clear the path to the evidence. Don't clear the evidence itself.
This doesn't mean leaving a crawl space full of junk. The standard is clear paths, no standing water, and no debris blocking the route, as noted in the access section above. There's a wide gap between moving boxes off a walkway and sweeping an attic floor clean of wings. Stay on the right side of it.
Documents to Gather and Who Pays for Damage
Paperwork is preparation too, and it's the part homeowners skip. Pull these together before the visit so the inspector isn't working from memory and guesswork.
- Prior inspection reports. Earlier WDI reports show what was found, treated, or left inaccessible last time.
- Treatment records and warranties. Include renewal terms and any conditions that could void coverage.
- Repair invoices. Foundation, plumbing, and roof repair receipts help date moisture problems and wood replacement.
- Leak history. Reuse the dated log from the moisture section above and attach your pre-repair photographs.
- Seller disclosure. Bring it if the home is under contract so statements can be checked against findings.
- Required transaction form. Confirm the report standard your lender or buyer expects, since a routine visual check isn't the same documentation. Review what's needed in a termite inspection report for closing before you book.
The Insurance Assumption That Trips Homeowners
Many owners expect a claim to cover whatever the inspection finds. Texas Department of Insurance guidance states that standard homeowners policies generally do not cover damage from termites or other insects, so that assumption needs correcting early.
An inspection identifies conditions and apparent activity. It doesn't establish insurance coverage or prove when damage occurred. If a separate covered event like water damage or fire is involved, your dated moisture records and photographs help separate termite damage from that event instead of letting the two blur together.
Compare termite service coverage, renewal terms, and voiding conditions before you sign anything new. And if the damaged area is safe, document it thoroughly before repairing it. Premature cleanup removes the evidence needed to distinguish active infestation, old damage, and moisture-related rot, which is exactly the distinction warranty and sale disputes turn on.
What Inspectors Check and How to Read the Report
The inspector works a deliberate sequence, starting outside. Expect the route to run from exterior grade and foundation conditions to sill plates, door and window frames, crawl-space structural wood, plumbing penetrations and moisture sources, and finally accessible interior finishes.
This foundation check shows the kind of close visual work involved.
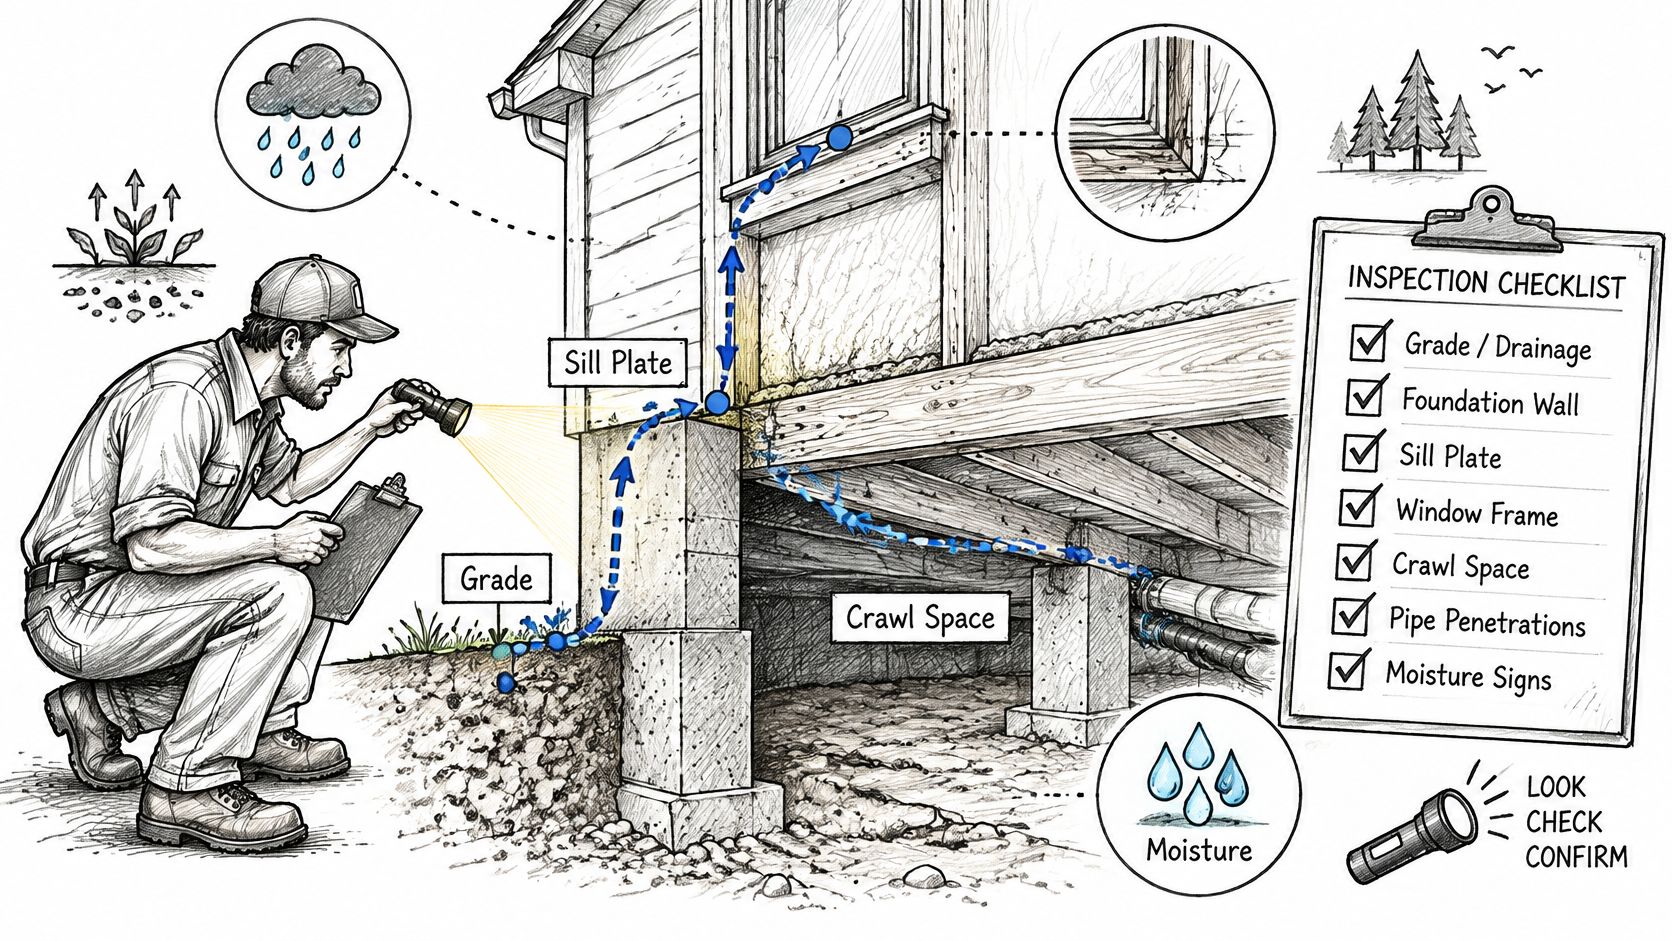
The toolkit is simple and specific. A bright light, a probing tool, a tape measure, a floor plan or graph paper for diagramming, and a moisture meter where appropriate cover most of the work. Subterranean termites can consume the inside of wood while leaving the exterior shell intact, so the probe matters. Wood that looks painted and sound can still be hollow underneath.
Texas Department of Agriculture termite guidance frames the inspection around previous treatments or infestations, active wood-destroying insects, resulting damage, and conditions that increase vulnerability. It's a careful visual examination of accessible areas, including permanently attached decks, porches, and storage sheds, and hidden termites are precisely why access determines quality.
Watching an inspector work through a foundation and crawl space makes the sequence easier to follow.
The report identifies visible current or previous evidence and lists inaccessible areas. It does not certify structural soundness or guarantee the absence of insects, and understanding wood-destroying insect inspections and reports helps you read those limits correctly.
Report findings and next steps
| Report finding | What it means | Your next step |
|---|---|---|
| Active infestation | Live termites or fresh tubes were seen | Ask for a treatment plan and timeline |
| Previous treatment or infestation | Evidence of past activity or past treatment | File the treatment record and warranty |
| Damage | Wood is compromised by termites or moisture | Get a structural repair estimate |
| Conducive conditions | Moisture, wood-to-soil contact or drainage defects | Fix the cause before treatment |
| Inaccessible area | The inspector could not reach it | Request a return visit or a written limitation |
| Recommended follow-up | Further inspection or monitoring is advised | Schedule and keep the dated record |
Keep the written diagram. A good one marks damage, wood-to-soil contact, utility penetrations, porches, drainage defects, and moisture problems in place, which makes it the most useful page when you're getting repair or treatment quotes later.
Book Your Magnolia Inspection and Confirm Access
Start the booking call with an address check. A Magnolia mailing address does not always mean the property sits inside the city limits, and ZIP codes describe mailing areas, not city boundaries. Confirm whether the home is in Magnolia city or in unincorporated Montgomery County before you assume coverage, since the answer can change how the visit gets scheduled and routed.
What to Have Ready on the Call
- Full property address with ZIP code. State whether the home sits inside the Magnolia city limits or in unincorporated Montgomery County.
- Closing or sale date. Add the report standard your lender, buyer, or agent requires.
- Prior treatment and warranty details. Include renewal dates and the company that holds the warranty.
- Your access list. Note locked gates, attic hatches, crawl-space panels, and anything from the first table you could not clear.
- Pet and occupancy information. Say who will be home and where animals will be secured.
FullScope Pest Control is one local option that provides wood-destroying insect inspections and reports for real estate transactions in Southeast Texas. Whichever company you choose, send the access list in writing after the call and confirm the appointment window. Ask them to note any area you could not open, so the limitation lands in the report rather than surfacing as a surprise on site.
Book your Magnolia termite inspection this week, before closing deadlines compress your options. Send your full address with ZIP code, your closing date, prior treatment records, and your written access list when you schedule, then clear the foundation, attic hatch, and crawl-space entry while leaving every tube, wing, and damaged board untouched for the inspector to read.