 1500+ reviews

Exclusion Pest Control: Your Complete DIY Guide
You've got the same problem a lot of Southeast Texas homeowners run into. The spray gets rid of what you see, the dead roach gets swept up, and then a week later something else is skittering across the kitchen floor, or you hear scratching in the attic after dark. That loop is exactly why exclusion pest control matters. Instead of only killing pests after they're already inside, exclusion focuses on blocking entry, sealing cracks, screening openings, and fixing the exterior conditions that keep inviting pests back in. In places like Magnolia, where heat, humidity, and shifting building materials all work against tight seals, that difference changes the long-term math. If you want the plain-English version of the concept, this overview of exclusion is a good starting point. The practical version is what follows, the walk-around, the materials that hold up, and the point where a homeowner's weekend project stops being enough. What Exclusion Pest Control Actually Means Most homeowners meet pest control through the same routine, a can of spray, a visible dead bug, and then the same activity a few days later. That's reactive control. Exclusion pest control is different because it treats the house like a structure that can be defended, not just a place where pests are cleaned up after they get in. The core idea behind exclusion The logic is simple. If a mouse, roach, or ant can enter through a gap, the house keeps serving as shelter no matter how often the interior gets sprayed. Exclusion changes that by physically closing off the route of entry, which is why it pairs so well with inspection and maintenance instead of standing alone as a quick fix. That approach is already familiar in the trade. In a Cornell summary of a 2016 to 2017 SCOPE and Pest Cemetery survey, 89% of respondents said exclusion is a valuable part of their work, and 70% reported using some form of exclusion to block harborage and passageways indoors. The same survey found 84% use exclusion to control rodents inside buildings, while only 30% use it to keep cockroaches out, which shows how strongly the method is tied to rodent work and how unevenly it gets applied across pest types. Cornell's summary of the survey also notes common adoption barriers, including training, materials, and customer willingness to pay. Practical rule: If the house still offers a path in, the pest problem isn't finished, it's only been interrupted. What this article focuses on The useful part for a homeowner is not the theory. It's the inspection walk, the gaps that matter, the materials that last in humid weather, and the signs that say the job has outgrown a DIY repair. In Southeast Texas, that matters because door frames swell, sealants age unevenly, and rodent pressure doesn't wait for a convenient weekend. A sealed house doesn't mean a pest-free life forever. It means you stop feeding the same entry points every season. That's the kind of change that makes exclusion worth the effort. The Walk Around Inspection That Finds the Gaps Start outside. Not with a shopping cart, not with foam, and not with the attic ladder. Start with a slow perimeter walk in daylight, because most of the useful entry points are visible if you know what to look for and you don't rush past them. Walk the perimeter first Look where utility lines enter the wall, where siding meets the slab, and where concrete has pulled away from the house. Check the garage door perimeter and every exterior door, especially the bottom seal and the side weatherstripping. In humid Southeast Texas, those soft materials change shape, and a gap that looked fine in spring can open up by late summer. Then move upward. Roofline openings, soffit vents, fascia seams, and chimney gaps all deserve attention because pests don't need a dramatic opening, they need a usable one. The National Park Service rodent exclusion manual treats 1/4 inch or larger as the threshold for sealing holes, cracks, and gaps, and that's a useful rule of thumb because it forces you to stop guessing and start measuring. The NPS rodent exclusion manual also reinforces vent protection with physical barriers, not just patching. Any opening you can work a pencil into deserves a second look, and anything around that size is worth treating as a real entry point. Don't skip the indoor checkpoints Inside, check under the kitchen sink, behind the dishwasher, around the laundry drain, and where the HVAC condensate line exits the house. Those spots are easy to ignore because they're tucked behind appliances or low to the floor, but they're exactly where small gaps hide. If you've seen droppings, grease marks, or shredded nesting material, write down the exact location instead of just mentally noting it. Keep the list simple. Write the location, the size or type of opening, and whether it's an exterior gap, a utility penetration, or a roofline issue. That list becomes your shopping plan, and if you end up calling a technician, it also gives them a clean starting point instead of a vague “we've got pests somewhere” description. Materials and Techniques Matched to Each Pest The mistake most homeowners make is buying one product and hoping it fits every opening. It doesn't. A gap around a pipe, a vent opening, and a loose door sweep all need different fixes, and in a hot, wet climate the wrong material usually fails first where it gets the most movement. Build the repair around the pest For small rodent gaps, the usual workhorse is steel wool or copper mesh packed tightly into the opening, then held in place with exterior-grade caulk or sealant. The mesh gives the barrier its chew resistance, and the sealant keeps it from working loose. That's a good fit for narrow voids, but it's the wrong choice for large moving gaps or spots that need to stay serviceable for future access. For vents and crawl-space openings, use 1/4-inch hardware cloth or smaller. The mesh
Quarterly Pest Control Cost: 2026 Average Pricing

The typical quarterly pest control cost in the U.S. runs $100 to $300 per visit, or about $400 to $700 per year, and Magnolia, TX homes often land between $120 and $260 per quarter depending on size, scope, and pest pressure. If you just got three quotes for the same house and the numbers don't match, that's normal, but only one of those quotes is likely to be fair for the protection you need. A Magnolia homeowner can get one bid that looks cheap on paper, another that's padded with extras, and a third that's priced correctly for Southeast Texas conditions. That spread usually comes down to what's included, how much pressure the property is under, and whether the provider is selling prevention or just a quick spray. What Quarterly Pest Control Costs in 2026 A Magnolia homeowner with an 1,800-square-foot house might get three very different quarterly quotes for the same basic service, and that's exactly why people get confused. One provider prices the job like a light perimeter spray, another prices it like a full preventive program, and a third pads the estimate because they expect callbacks or heavier pest pressure. The number on the invoice matters, but the service scope matters more. A quarterly plan means four scheduled visits per year, usually spaced about every 90 days. That schedule is built for ongoing barrier treatment, not one-time rescue work. In the national market, the common quarterly band is $100 to $300 per visit with annual totals often landing between $400 and $700 as summarized in this cost guide. Another pricing breakdown puts quarterly contracts at $95 to $145 per treatment and $380 to $580 per year, with an effective monthly cost of $31 to $48 in this annual cost breakdown. Practical rule: if a quote is far below the common quarterly band, ask what got left out. Cheap is only cheap when the treatment actually covers the pests you have. For Magnolia and the rest of Southeast Texas, the working range usually sits in the $120 to $260 per quarter zone for standard residential coverage. That's not a special local discount, it's the natural result of warmer conditions, heavier pest pressure, and the need for more complete perimeter work. The most common mistake homeowners make is comparing only the annual number and ignoring whether the plan is built for prevention or just minimal service. A good way to sanity-check the quote is to ask whether the provider is selling a quarterly maintenance plan or repeating a one-off treatment on a schedule. Those are not the same product, even when the pricing sounds similar. See whether quarterly service is worth it before you sign What's Actually Included in Each Quarterly Visit A real quarterly visit should do more than make the outside look treated. At minimum, the technician should inspect common entry points, treat kitchens and bathrooms where activity shows up first, apply exterior perimeter protection, place bait or other targeted material where appropriate, and leave a service report that tells you what was done. If a company won't put the scope in writing, they're leaving room to underdeliver. The published pricing tiers line up with how much of the home gets covered. Interior-only service generally runs about $90 to $140 per quarter per this pricing guide. A standard interior plus exterior perimeter plan usually lands at $120 to $180 per quarter, while a broader perimeter-plus-interior-touch-up model sits around $150 to $210 per quarter from the same guide. For a straight residential benchmark, the quarterly visit band of $100 to $300 also shows up in national cost references here. Scope tier Typical per-visit cost What's included Best fit Interior-only $90 to $140 per quarter Targeted indoor treatment, limited exterior work Small homes with low outdoor pressure Interior plus standard exterior perimeter $120 to $180 per quarter Interior touch points, perimeter barrier, routine follow-up Most single-family homes Perimeter plus interior touch-up $150 to $210 per quarter Broader exterior service with indoor refresh Wooded lots, heavier pressure, larger homes The excluded pests matter as much as the included ones. Termites, rodents, mosquitoes, and wildlife usually sit outside a general quarterly insect plan and need separate work. If the provider bundles everything into one vague “quarterly service” label, read that as a warning sign, not convenience. If you need a separate specialty call, a practical reference point is a hornets nest removal guide from Bulls Eye Repair, which is useful because wasps and hornets are a different job from routine quarterly prevention. You want the right response for the actual pest, not a catch-all spray that sounds broader than it is. Review plan structure before you compare contracts The Five Factors That Change Your Quarterly Price Quarterly pricing is not random. It moves for five reasons, and if you know those drivers, you can spot a fair quote fast. Property size comes first Larger homes cost more because technicians treat more perimeter, more entry points, and more interior square footage. A useful rule of thumb from cost breakdowns is that some providers add roughly $25 per 1,000 square feet over 1,500 square feet in this pricing guide. That's why a compact home in a low-risk neighborhood can be priced lower than a bigger house with the same pest list. Pest type changes the job General ant control is usually cheap enough to fit a routine quarterly plan, and recurring ant service is often priced around $30 to $50 monthly in recurring-plan terms as noted in the pricing summary. Once the job shifts to termites, bed bugs, heavier rodent work, or repeated fire ant pressure, the estimate stops looking like routine maintenance. Specialty pests need different materials, more labor, and sometimes separate inspection or exclusion work. Straight answer: if your provider says every pest is covered by the same quarterly rate, they're either oversimplifying or planning to bill the real work later. Severity matters next. A light prevention account is cheaper than a home that needs an initial cleanout before the
What Attracts Termites To Homes In Southeast Texas
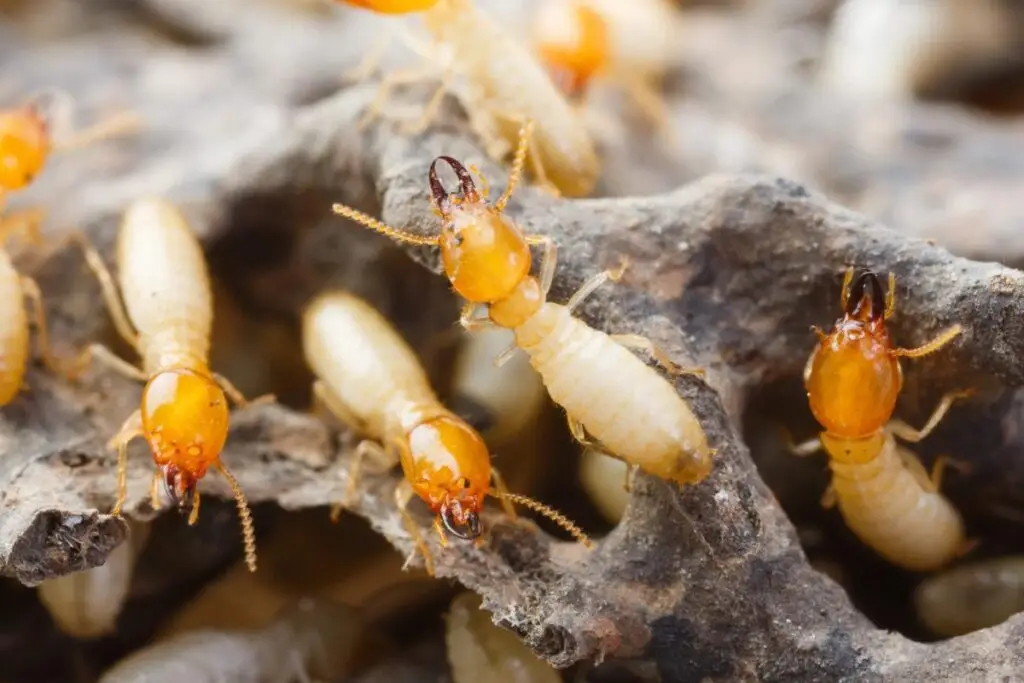
Southeast Texas gives termites many of the conditions they need to remain active. Warm temperatures, frequent rainfall, high humidity, irrigated landscapes, and abundant wood can support colonies around homes for long periods. Subterranean termites can move through soil toward structural materials, while other wood-destroying insects may leave damage that looks similar at first. Effective termite control begins with understanding what draws activity toward a particular property. Professionals examine moisture, wood-to-soil contact, drainage, foundation access, construction details, and visible evidence together. This allows treatment and prevention to focus on confirmed risks instead of assuming that every damaged board has the same cause. Moisture Creates Favorable Conditions Near The Structure Subterranean termites depend on moisture as they travel between soil and wood. Southeast Texas rainfall and humidity can keep foundation-adjacent soil damp, especially where shade, irrigation, or poor drainage slows evaporation. Plumbing leaks and roof runoff may create additional moisture inside or beside the building. Inspectors often evaluate: Moisture alone does not confirm an infestation. However, persistent dampness can support termite travel and make wood more vulnerable. Correcting the source strengthens prevention, but active colonies still require professional assessment and treatment. Wood And Cellulose Give Termites A Dependable Food Source Termites feed on cellulose found in wood, paper, cardboard, roots, mulch, and other plant-based materials. Structural framing may be the greatest concern, but exterior materials can provide stepping-stones toward the home. Firewood, tree stumps, landscape timbers, construction scraps, and deep mulch may keep food close to soil and foundation edges. Some damage may also come from beetles or other wood-destroying insects. Learning about wood-borer clues helps explain why identification should come before treatment. Exit holes, powder-like debris, internal galleries, and weakened wood can overlap visually, yet the responsible insect and treatment method may differ. A trained inspection separates termite evidence from wood-borer activity, decay, and moisture damage before recommendations are made. Direct Soil Contact Can Hide Termite Entry Subterranean termites commonly approach structures from below ground. When siding, posts, steps, lattice, or other wooden features touch soil, termites may enter without building long, visible tubes across exposed foundation surfaces. Dense landscaping can make these routes even harder to see. Common risk conditions include: Visible separation between soil and structural materials improves inspection access. Professionals can then look for mud tubes, damaged wood, swarm evidence, and concealed entry points before selecting termite control options. Construction Gaps And Hidden Spaces Offer Protection Termites benefit from sheltered routes where they can move without exposure. Cracks in slabs, utility penetrations, expansion joints, attached garages, plumbing openings, and inaccessible crawl-space areas can connect soil with structural wood. Finished walls and flooring may conceal activity until damage becomes more advanced. Professional inspections consider how the building was constructed and modified. Additions, patios, renovations, and repaired plumbing can create new transitions that deserve attention. Inspectors may use visible evidence, moisture readings, probing, and knowledge of termite behavior to map likely routes. A property-specific plan may involve: This approach avoids relying on one standard treatment for every structure. Prevention And Monitoring Protect The Home Long-Term Southeast Texas termite pressure does not disappear after one dry week or a single repair. Rainfall returns, irrigation continues, landscaping changes, and small leaks can develop over time. Prevention therefore requires continued attention to both the property and the termite-control system. The discussion of prevention costs shows why pricing depends on property size, construction, treatment type, infestation extent, and monitoring needs. Baiting systems, liquid soil treatments, wood applications, and combined approaches involve different installation and maintenance requirements. Long-term protection may include annual inspections, monthly monitoring of active bait stations, replacement of consumed bait, perimeter evaluation, and correction of new moisture or wood-contact conditions. Professional records help technicians compare current findings with earlier visits and identify whether activity is new, recurring, or already addressed. Termites are attracted to homes when moisture, cellulose, soil access, shelter, and structural openings overlap. Southeast Texas naturally supplies much of that environmental pressure, but every property presents a different combination. A detailed inspection provides the clearest basis for targeted treatment and practical prevention before hidden feeding becomes a larger repair concern. Protect The Wood Before Termites Reach It Contact Fullscope Pest Control for professional inspections, targeted termite control, baiting, soil and wood treatments, and long-term monitoring.